Setting Up K9s with EKS
- Configure Access: To use K9s with an EKS cluster, you first need to ensure your
kubectlis configured with the appropriate access credentials for your EKS cluster. This usually involves using the AWS CLI and configuring your kubeconfig file with credentials that allow access to your EKS cluster. - Install K9s: Once your
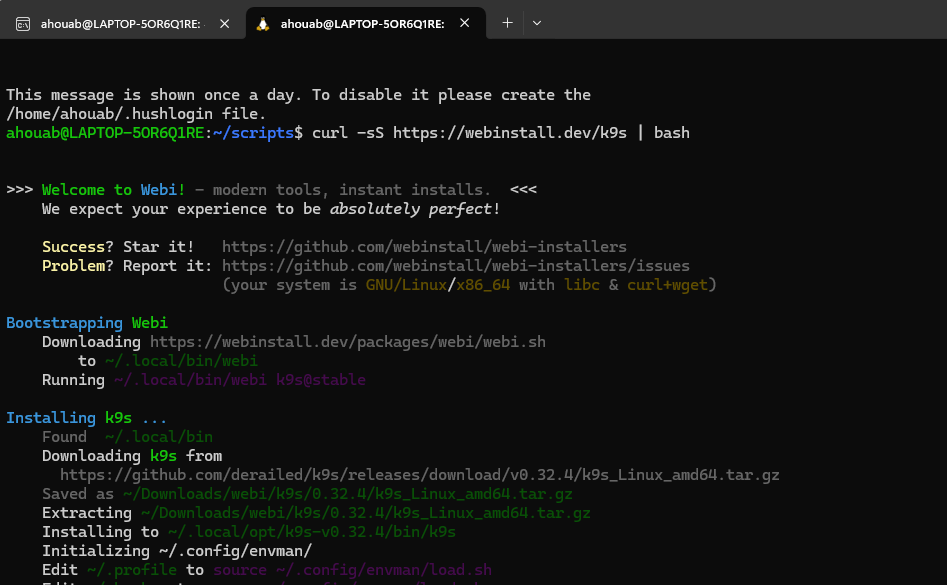
kubectlcan interact with your EKS cluster, install K9s on your local machine. K9s can be installed via various package managers or downloaded directly from its GitHub repository (see below example in Ubuntu)
Benefits of Using K9s with EKS
- Enhanced Monitoring: K9s provides a real-time view of cluster resources, which is crucial for effectively monitoring the health and performance of applications running on EKS. It allows you to monitor pods, deployments, and other resources dynamically.
- Efficient Resource Management: Quickly browse, create, update, and delete Kubernetes resources. K9s simplifies these tasks with keyboard shortcuts and command-line functionalities, which can be much faster than using the AWS Management Console or
kubectlalone. - Logs and Debugging: K9s makes it easy to view logs of pods and containers. This is particularly useful in a managed Kubernetes environment like EKS, where you might need to debug issues related to your applications quickly.
- Scalability Operations: Managing the scaling of resources directly from K9s is straightforward. You can adjust the number of replicas for deployments, manage jobs, and work with horizontal pod autoscalers effectively.
- Security and Access Control: Given that EKS integrates with AWS IAM for security and access management, using K9s does not compromise security protocols set via EKS. K9s operates within the permissions granted to your Kubernetes user account configured through EKS and IAM.
Best Practices
- Keep
kubectland AWS CLI updated to ensure compatibility with the latest versions of EKS. - Regularly update K9s to leverage new features and improvements.
- Use namespaces wisely to manage resources and permissions efficiently in K9s for large and complex EKS environments.
- Integrate monitoring tools like AWS CloudWatch with K9s for a comprehensive monitoring setup.
K9s can significantly enhance your experience managing EKS clusters by providing a faster, more interactive way to perform common Kubernetes tasks, thus improving your productivity and operational efficiency.
K9s provides a wide array of commands and shortcuts that make managing Kubernetes clusters more efficient. When you launch K9s, it brings you to its main interface where you can interactively manage your Kubernetes resources. Below are some of the key commands and functionalities you can utilize within K9s:
Navigation and General Commands
:ctx– Switch between different Kubernetes contexts (useful when managing multiple clusters).:ns– Change the current namespace or view resources in different namespaces.:alias– View and manage resource aliases.?– Show all the available command shortcuts and help menu./– Enter a command mode to directly executekubectlcommands.:– Access command mode to jump to a Kubernetes resource type directly, like:pofor pods.
Resource-Specific Commands
0– View nodes.1– View namespaces.2– View pods.3– View deployments.4– View daemon sets.5– View replica sets.6– View services.7– View config maps.8– View secrets.9– View jobs.
Resource Management Commands
d– Describe the selected resource in detail.l– View the logs for a selected pod or container.e– Edit the selected resource.x– Shell into the selected pod for interactive troubleshooting.Ctrl-a– Show all available resources in the namespace.Ctrl-d– Delete the selected resource.
Logs and Monitoring
s– Sort resources based on a specific column (like CPU or memory usage).f– Filter resources based on specified criteria.
Exiting
Ctrl-c– Exit out of logs or current view.q– Quit the application.
These commands are just a starting point for interacting with K9s. The tool is designed to make it easy to switch between different views and operations, enhancing your ability to manage and troubleshoot Kubernetes resources efficiently. If you’re using K9s regularly, it might be helpful to familiarize yourself with these and other advanced features through hands-on use and exploration.